Loading & Self-Signing a Document in DocuSign
You will need sending permissions to self-sign a document using this feature. Please contact your DocuSign Unit Contact (DUC) or rms@austin.utexas.edu to discuss this feature.
To sign a document that is not yet in DocuSign, and optionally to send the signed document to others, first log into DocuSign from http://docusign.utexas.edu.
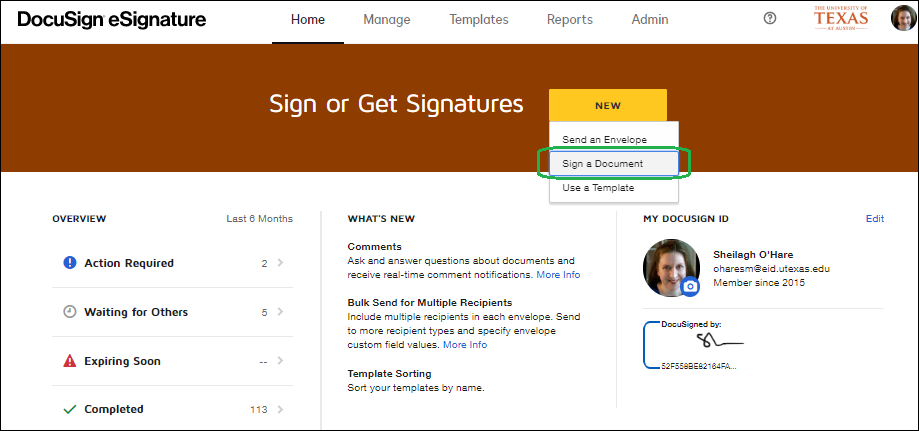
Next, click [New] ˃˃ [Sign a Document]
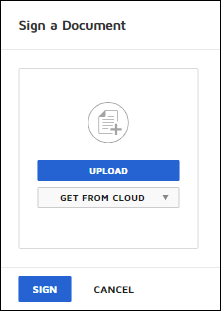
On the next dialog, click [Upload] to pull in the document that has been saved to your desktop or server*, then click [Sign], and on the next page click [Continue] to start placing signature and other tags. You can also select [Get from Cloud] to pull in documents from Box.
|
* Note: If you received the document via email attachment, you will have to download the file to your desktop, local server, or UT Box before you can upload it to DocuSign |
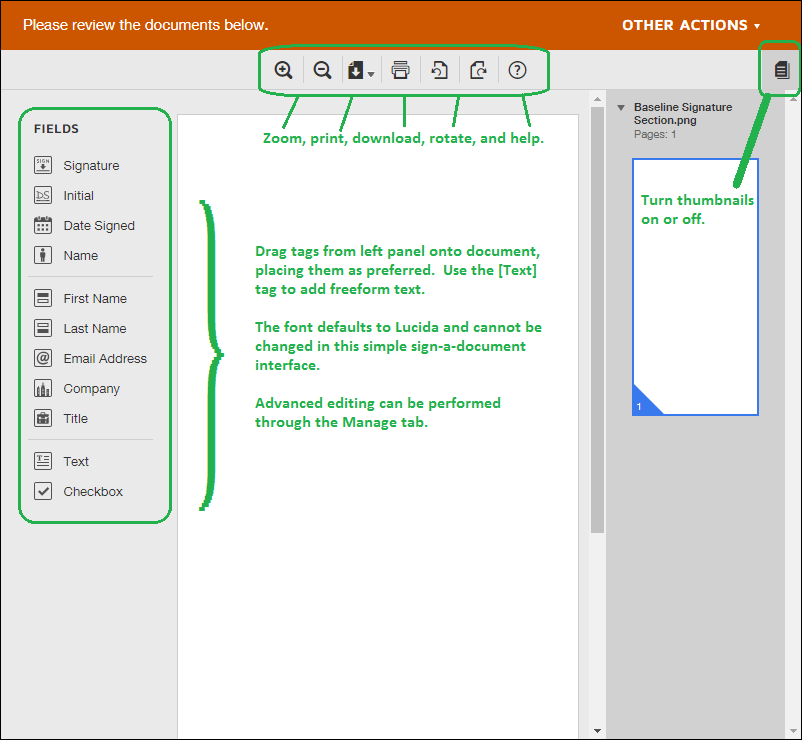
In the signing interface, you can drag signatures and other tags into place, zoom, rotate the document, print or download, and select “?” for help from DocuSign, including videos and additional documentation.
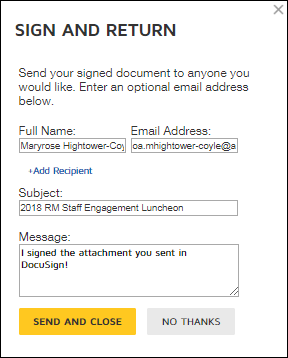
When done placing signatures and tags, click [Finish] in the lower right corner. A dialog opens asking if you would like to send your signed document to one or more email addresses. If you click yes, the email to the recipient will be sent with the document and the Certificate of Completion attached. The Certificate includes your IP address, which is identifying information that is not secure when sent via email.
As an alternative, to protect your IP address, click [No Thanks] to return to the DocuSign console. From your [Manage] tab, select your [Sent] folder. You will see the completed document, with a [Move] button on the right hand side of the page. Select the dropdown arrow on the [Move] button and select [Forward]. That displays an interface to enter one or more recipients and an email subject/message. If you only need your recipients to see the document, you should switch their action of “Needs to Sign” to instead be “Needs to View” to send reminders until they open the Review Document link, or select “Receives a Copy” for them to be sent one email with a Review Document link.
The signed document can be downloaded from your [Manage] tab ˃˃ [Inbox]. Click the subject of the envelope (document), then use the download or print icons as needed.
